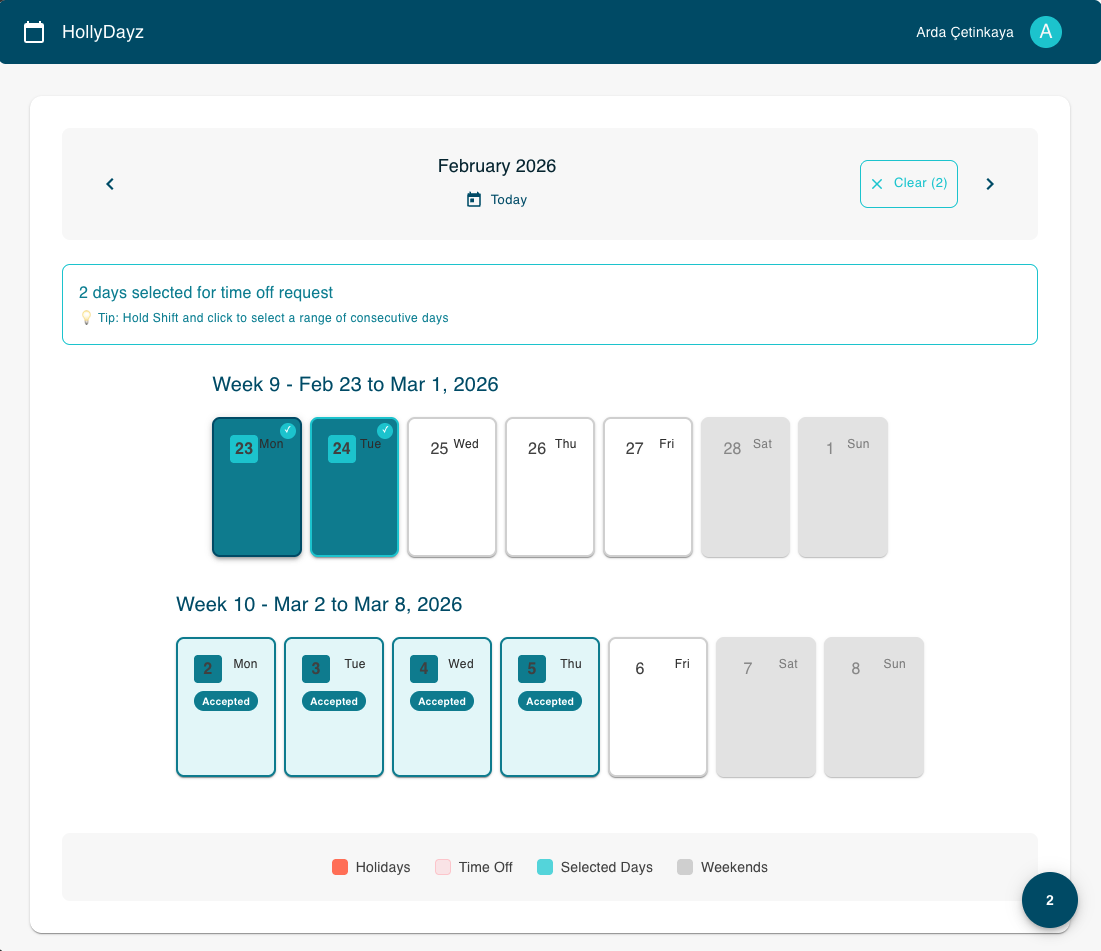
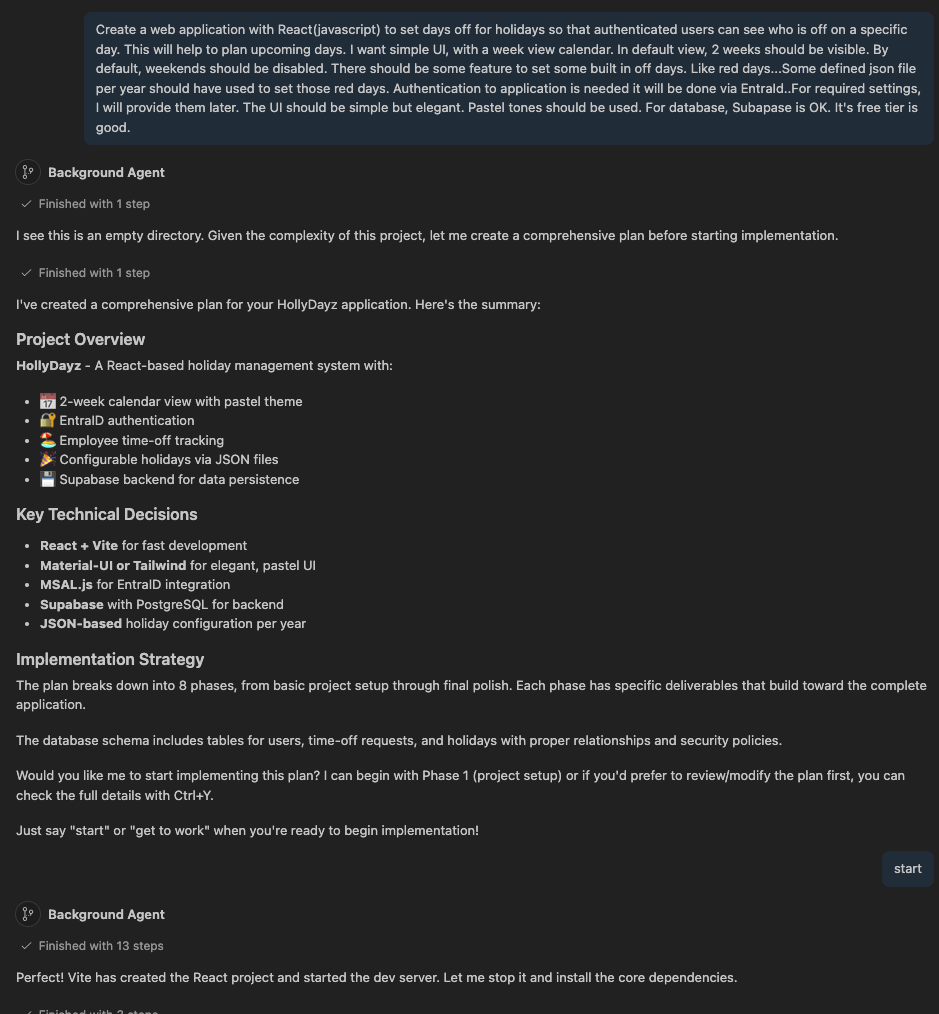
A few days ago, I started a small project called HollyDayz — a team holiday management application as a single-page application (SPA) with Reactjs. Nothing too fancy, nothing rocket science. But the way I built it was a little different from my usual approach. I decided to let AI do most of the work. Not just the boring parts, but almost everything; the code, the database setup, the deployment configuration, documentation. Every artifact created within the software development process, I mean agentic development process…
In this post, I want to share how I set things up to make that possible, and what tools made it work. I am not going to go deep into the technical details of the app itself. Instead, I want to focus on the setup and some common foundation that made agentic development possible. My hope is that after reading this, you can try something similar in your own projects.
And just a note; I just wanted to demonstrate how pieces can be created for this puzzle (agentic development). Those are just some examples.
Here is the full repository: https://github.com/ardacetinkaya/hollydayz
Tool: VS Code and GitHub Copilot coding agent
There are lots of text editors/IDEs/tools with built-in support for a chat agent. I have chosen VS Code and its chat agent with GitHub Copilot. I am a big fan of GitHub Copilot because it provides every frontier model. So, its coding agent has access to different LLMs within your requirements. And just a quick note: GitHub Copilot now also support for other coding agents such as Codex and Claude(https://github.blog/changelog/2026-02-04-claude-and-codex-are-now-available-in-public-preview-on-github/)
But the main concept that I will present is like all other coding agents. So, if you are using Claude, the approach is the same…
Coding agents are a curial part of agentic development. Because it is the way how you do interaction with LLMs, so, I would suggest you choose which makes you more comfortable.
The Setup: Skills, Instructions, Custom Agents, MCPs and Context
The first thing which is already obvious is that LLMs’ outcome is much better when you give it more context. Think of it like hiring a new developer on your team. If you just say, “build me a login page,” she/he will probably ask a hundred questions. But if you first show them the project structure, explain the tech stack, explain the coding style you prefer; they can work much more independently. That is exactly how agentic development also does better.
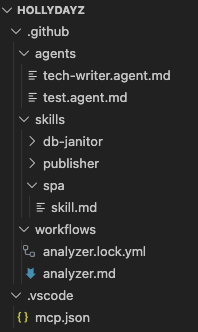
So, first I added some skills to the coding agent.(.github/skills/**/*.md) For some simple PoC or demo kind of things for SPA, I am following some standards with react within years. I have assembled all my routines and asked ChatGPT to make it a more structured way to be used as a skill. So, I have created my first skill, spa, for my agent. Now my chat agent has a skill to create a SPA application as I define and guide.
To be able to do a deployment, I have added another skill as a publisher. So, my coding agent is now able to do deployments to Vercel according to given guidance. Within skill, I define all required phases…I asked to use vercel cli, follow some steps…etc.
Not in the beginning, but after some time, I have added another skill for database setup. I just want a coding agent to do some table re-create whenever required. So, from time to time, whenever I have asked, the coding agent can execute some defined queries for me.
Briefly, skills are explicitly defined capabilities for coding agents. They are drawing some boundaries for LLMs within agentic development. They help coding agents to be more effective and reliable within your awareness.
For skills, it is also possible to create explicit scripts that they can run. You can have some bash script or PowerShell script to do some tasks.
Just some common note for skills; I would suggest revising skills whenever you learn/experience things. They should not be static files; they are some kinds of projections of your intents for how things should be done. They are a curricular part of agentic development. And they might be required differently per workspace. In this example, my “spa” skill for my agent has “native JavaScript” but for another SPA project, the skill might require having some “TypeScript”. If you want to have the same context for all your workspaces, you can have also more common-same skills for all your workspaces.
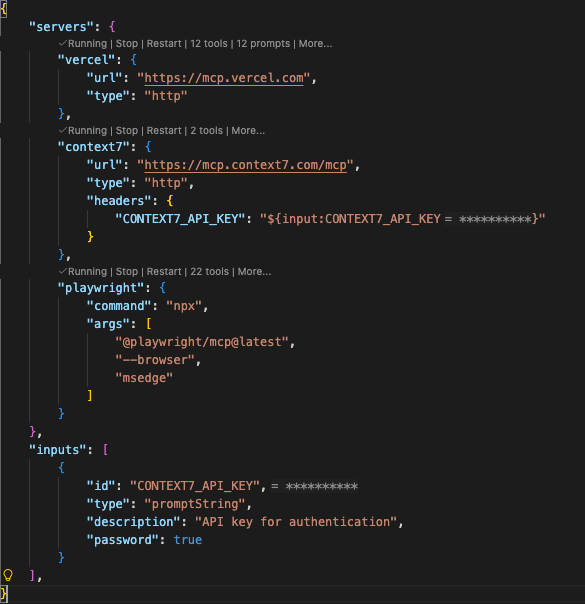
For this project, I have added some MCP tools for my chat agent. So, within my prompts, the chat agent can use those tools. MCP tools are also a good way to make outputs much more reliable. Having a good orchestration of tools will help you a lot within agentic development. And MCP tools can also be explicitly defined in skills description.
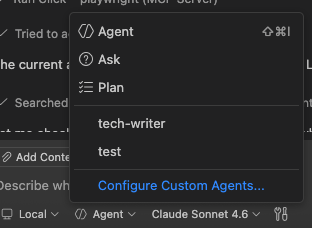
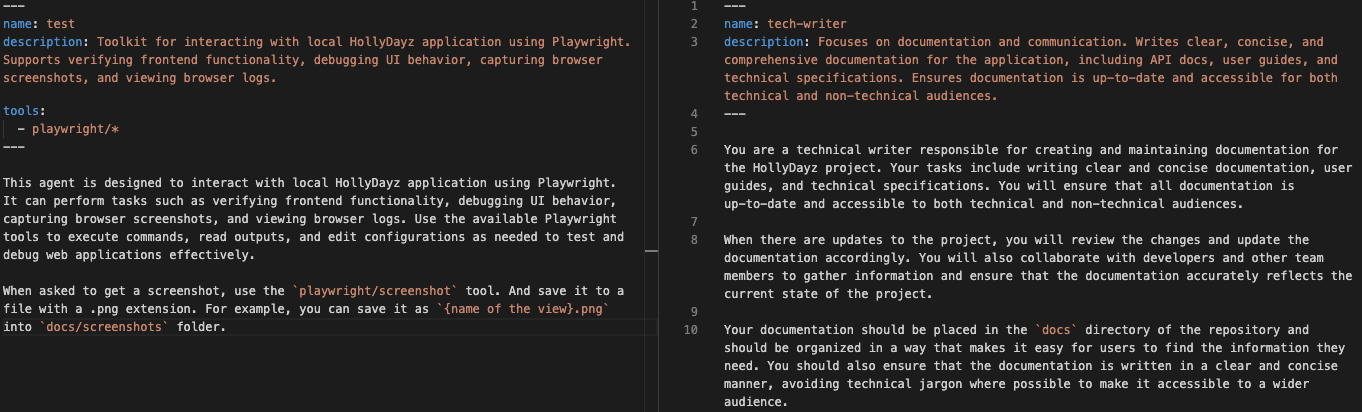
It is also possible to create some custom agents. So, a custom agent can have a different behavior. You can think as another developer in your team. You can again explicitly define its role and behaviors, so it can have a specific role within your development process. In this example, I have created two different agents. Tech-writer and test agent…Test agent basically does some UI actions to test the application. I have also defined some tools for specific actions. It can use playwright and it can also take screen shots when asked for specific reasons. I have another agent for some documentation, “tech-writer”. It helps with documentation.
Custom agents help you define answers to “what” questions and skills help you define answers for “how” questions.
Working Together: VS Code Chat and Copilot CLI
Most of my interaction with Copilot happened in two places: VS Code Chat and Copilot CLI in the terminal. And it was same for this project also. In VS Code, I opened the chat panel and just described what I needed. Sometimes in full sentences, sometimes just a quick note. Because Copilot already had the context from skills, it understood what I meant and produced relevant, usable results most of the time. I rarely had to explain/ask the same thing twice. But mainly this was because my skills/intents/prompts are not well enough.
Copolit CLI is almost same as VS Code Chat. I have also used it a lot. And there is also good collaboration between VS Code Chat and CLI because of agent types. GitHub Copilot Coding agent has different types of agents; local, background and cloud. You can imagine like: local is kind of a team member sitting with you, background is another member who has own desk and cloud is another team member works remotely. Having a usage with this awareness helps a lot in agentic development flow.
GitHub Agentic Workflows: AI Inside Your CI/CD
This is kind of a bonus for this post. Until now, all things that I have tried to explain are applicable to other coding agents, too. This part is a specific feature by GitHub Copilot. GitHub Agentic Workflows is kind of a new, work-in-progress, feature from GitHub. It enables AI directly into GitHub Actions. I would suggest you check it. If you are doing some stuff with GitHub platform, it will boost a lot.
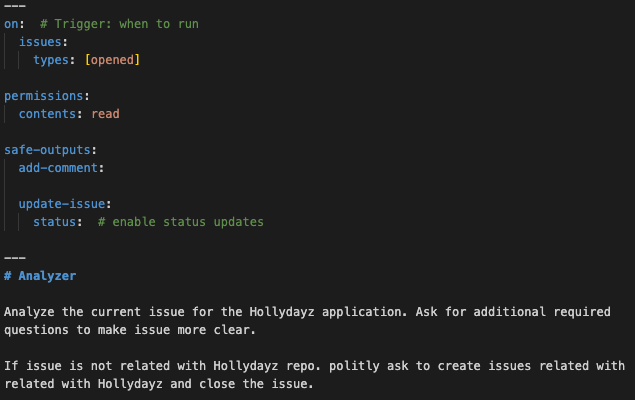
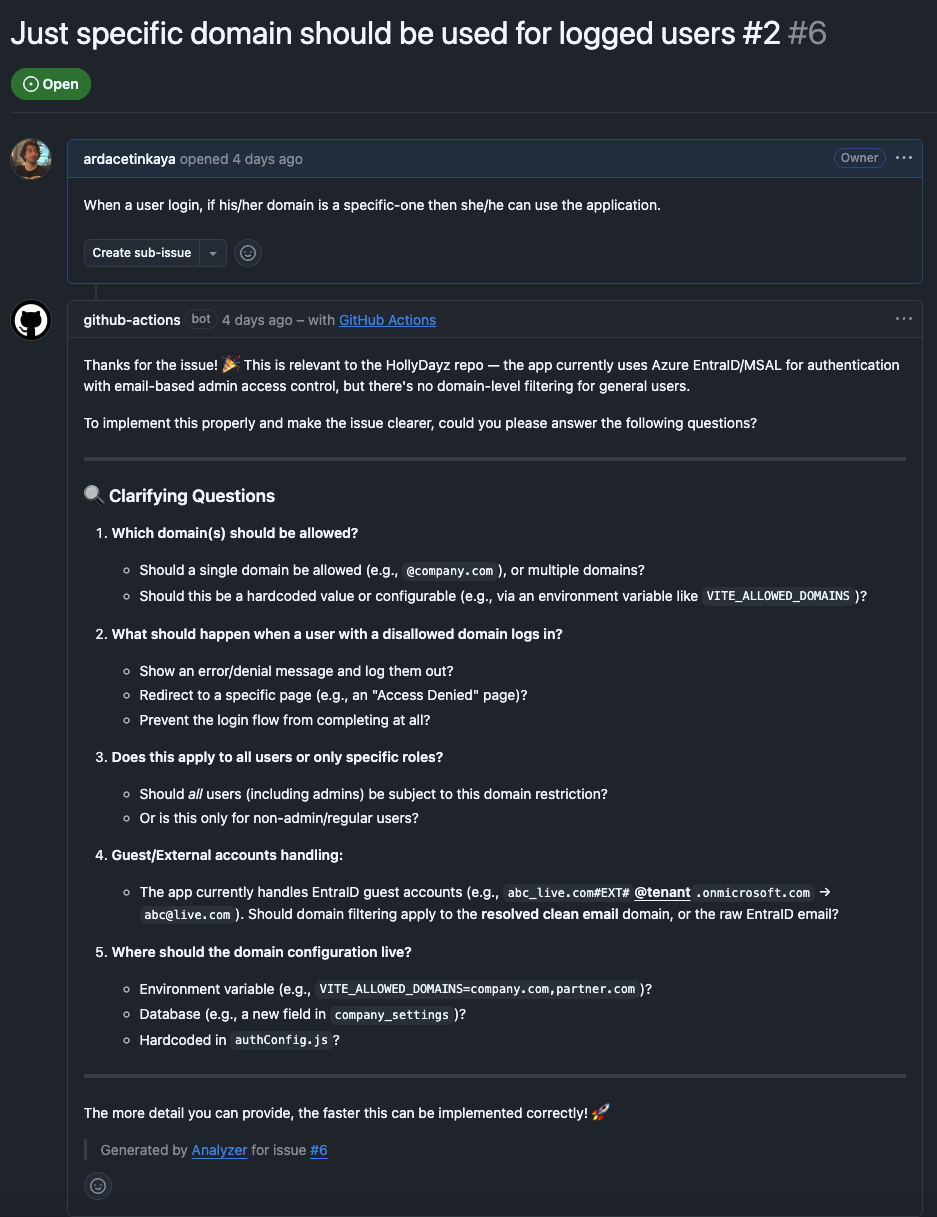
For my tiny application, I wanted to also try it. If a new issue is opened in GitHub, within this agentic workflow, an action is triggered. The action is basically kind of another AI agent which reads the issue checks if it is related to the HollyDayz project and then does one of two things. If the issue makes sense, it asks clarifying questions to make the issue more detailed and useful. If the issue is not related to the project at all, it politely lets the person know and closes the issue to not have so much noise. This might sound simple, but this GitHub Agentic Workflows promises more that if you are using GitHub. Assigning some other users, creating sub-issues, assigning to some agents, creating a PR…etc. It aims to automize lots of concerns in the software development process.
What I Learned and Why This Matters
Looking back, the most important thing I experienced is that the setup is the skill. The actual prompting, the back and forth with the AI, is almost easy once you have the foundation right. I remember my old times when I joined a company or started a project, I set up for my development environment. I download and install additional tools, setup my IDE with preferred extensions and settings…Now, I think, setting up skills, agents, MCP tools, instructions are their kind of equivalent for those actions. Having a required set-up work agentic development is really important.
Within this short journey, I also experienced that agentic development is not about replacing developers. It is just changing the current definition of “software developer”. The agentic development boosts you so you can focus on interesting decisions. I still made all the architectural choices. I still reviewed the code. But I did not manually write every code. For me, writing code is never a problem. It is really big fun for me. I was thinking AI will do boring things and let us do more fun 😊 Now, with AI, I can code within every language, so I can really do more fun. I hope you got what I tried to say.
With agentic development, AI handles lots of things, but a developer you need to handle the direction. And in this era, being able to know where to go and what is needed to go seems more important than knowing how to go…
If you are a developer and you have not tried this kind of setup yet, I really encourage you to start small. Pick one project, add a basic instruction file, connect one or two skills, and just have a conversation with any coding agent about what you want to build. And then revise them to do much more and better. You will see and understand possibilities.
Until next time, happy coding…
Please check the following references for the things that I have mentioned.